
Sourdough bread: the perfect demonstration that simplicity is the ultimate sophistication. A staple for billions of people across the world, bread is in fact a complex product that entails a wealth of knowledge in a 3-ingredient recipe.
If you start looking up sourdough bread baking techniques, you risk being overwhelmed by the magnitude of the notions you can find out there. But if you think you need to know everything about flour characteristics, kneading techniques, autolysis, proofing, scoring, baking tools and equipment to start baking good sourdough bread, you’ll soon find yourself queuing in the nearest bakery.
Instead of getting intimidated to paralysis by the challenge of becoming a pro baker overnight, follow the instructions in this article and give yourself the chance to enjoy a very meditative and rewarding hobby, that will spread scrumptious fragrance and joy in your home.
Homemade sourdough bread is something that’s never missing during As Soup As Possible events. Maybe you are here because you had the chance to try some, or you received some of my sourdough starter just recently.
Either way, here comes an easy sourdough bread recipe that will allow you to bake a fragrant bread loaf that – if properly stored – will stay fresh and delicious for up to a week.
Of course I wish you to become a sourdough bread virtuoso and engage in overly complicated recipes, if that’s what you want, but let me say this one is a good place to start from.
Let’s get started!
Don’t forget to feed your sourdough starter in time for making bread, that is about 4 hours beforehand. Check out this previous article for a reminder about how to keep your starter alive and bake happily ever after.
Time management will probably be the most challenging side of sourdough baking, in the beginning, but don’t get discouraged: it’s just a matter of habit. After a while, you will even be grateful you have an excuse to slow down and take your time to let go of your worries to focus on creating something magical, good and comforting for yourself and your loved ones.

Behold, Elvira the starter!
Here’s a possible timeline:
- Saturday, 6PM: feed the starter
- > 10PM: store 150g starter in the fridge and use the rest to…
- > 10:10PM: knead your bread
- Sunday, 9AM: stretch and fold
- > 10:00AM: second round of folds
- > 11:30AM: bake your loaf
- > 12:30AM: your warm bread is ready for lunch!
You can also use a starter that’s been fed within the previous 24 hours, provided that you take it out of the fridge some time before kneading, so that you can use it when it has reached room temperature.
Now that you have some activated sourdough starter, you can move on to the procedure.
Ingredients for your first sourdough bread loaf
• 450-500 g flour*
• 350 g water (room temperature)
• 11 g sea salt
• 150 g sourdough starter (recently fed, room temperature)
• optional: a handful of sesame seeds
* Flours and their characteristics make for an entirely different chapter. For now, you can start with white wheat flour or with a mix of 60% white flour, 20% wholewheat flour, and 20% semolina.
Kneading and leavening
Place the starter in a large bowl. Add water and use your hands to partially melt the starter.
Begin to mix in the flour(s) gradually.
Keep in mind that different flours absorb different amounts of water and you will need to learn to “feel” and assess the dough as you incorporate the ingredients.
Eventually add the salt and continue kneading, folding the mix over in the middle and pushing it with your knuckles.
In this recipe, you don’t want salt to get in direct contact with your starter, to avoid any strong interference with the leavening.
Once the mix becomes more coherent, move it from the bowl to a clean surface and continue working it with long moves, using the heels of your hands to knead.
Add flour if necessary, and keep kneading for about 15 minutes, or until you reach what pizza bakers call “punto di pasta”, that is to say the point at which the stuff you’re working feels like it’s transformed from just a mixture into properly coherent dough (“pasta”, in Italian).
Kinetic energy is an important ingredient in bread, as it’s necessary to the development of gluten links, so don’t be afraid to be rough with your dough! If you feel like letting out some frustration, feel free to take advantage of it.
At least at this stage, it can take it and it will even help your bread build a better structure. I promise I’m not kidding: take it out on the dough, guilt-free!
Leavening
Place the dough back into the bowl, cover it with a clean damp cloth and let it rest overnight.

Folding
In the morning, place the dough back on a clean smooth surface dusted with flour. Gently flatten its top to slightly flatten it, then pinch it from one edge and fold it over in the center, then move on to the other four sides, as if you are folding the corners of a square handkerchief in its centre to make a smaller square, except in this case you want to have a round shape.
Flip it over and pivot it a couple of times with both hands. When you’re done, your dough will be arranged in a round bun with a tight surface.
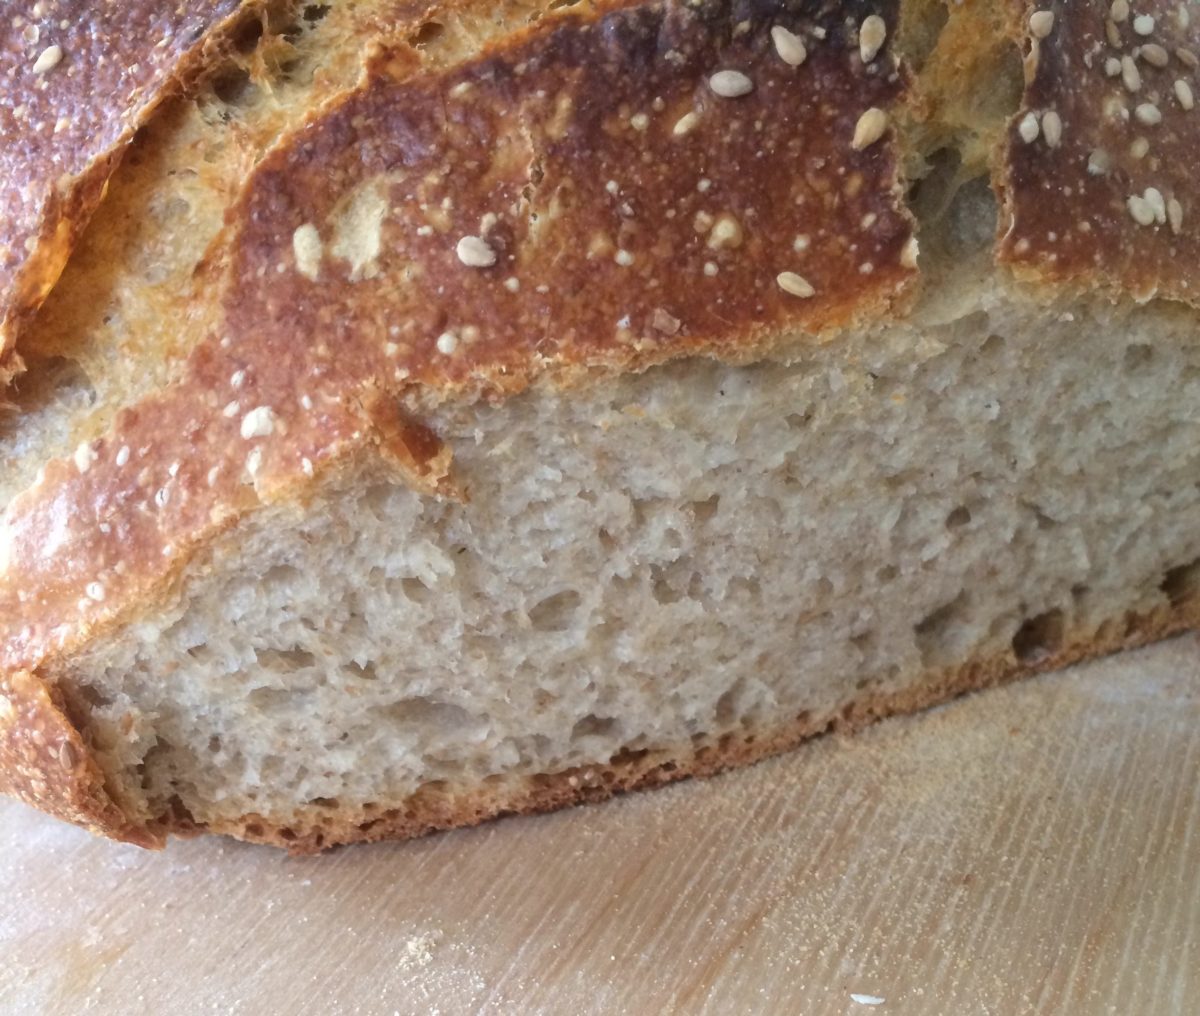
If you like a sprinkle of sesame seeds on the crust of your bread, this is the right time to add it.
Let it rest, covered with a cloth, for a little over one hour, then repeat the folds. This phase helps incorporate more air and strengthen the gluten links that will structure and support your loaf.
Scoring and Shaping
 Heat the oven at max temperature, static, with a tray of hot water at the bottom. This will ensure that the inside of your oven fills with some steam that will help the crust of your loaf develop its crunchiness.
If you have a baking stone or a cast iron pot with lid (AKA “Dutch oven”), place it in the oven before turning it on.
You won’t need to add the water tray, if you use a Dutch oven.
It’s time to “score” your bread, that is to sai to slash the loaf with a sharp blade or knife, so that it doesn’t crack in undesired ways during baking. Be careful and cut only superficially, two or three times across the bun, and just before putting your bread into the oven.

Baking
Take the cast iron pot or the baking stone out of the oven and quickly place the bread inside, then cover with the lid and place the pot back into the oven. If you are using a pizza stone and you happen to have a pizza peel, you can use it to place the bread on the stone without taking it out of the oven. If you don’t have either, you can use a baking tray, slightly greased with oil. I do not recommend using parchment paper at high temperatures, as it becomes brown and smelly above 250 degrees Celsius. If you really want to use it, set your oven at 250 degrees instead of its maximum temperature, and add 5 minutes at 250 degrees at the beginning of the baking time.
After about 10 minutes at maximum temperature, lower the temperature of your oven to 220°C and continue baking for further 40 minutes or until the loaf makes a hollow sound when patted.
 Take your bread out of and let it rest on a cooling rack.
Try to resist the temptation of slicing it before it’s cool, or it will dry up too quickly and it won’t stay fresh as long.
Enjoy!
PS: Keep your sourdough bread in a canvas sack or a brown paper bag.
The leftovers – if there will ever be – can be used to make breadcrumbs that you can use in several recipes. Just cut them into small pieces and grind them once completely dry. You can store them in glass jars for weeks.

hi must your bread rise first before putting it on the hot iron pot to bake thankyou
Ho Melvin, yes, the steps are: 1) bulk rising, 2) folding and shaping, 3) proofing (in a basket, if you have one, or in a lined colander), 4) baking in Dutch oven.
This recipe concept is wonderful!!! Keep it up.
Thanks, Mutie, I hope you’ve been baking great bread! 🙂